Electron Microscope Diaries
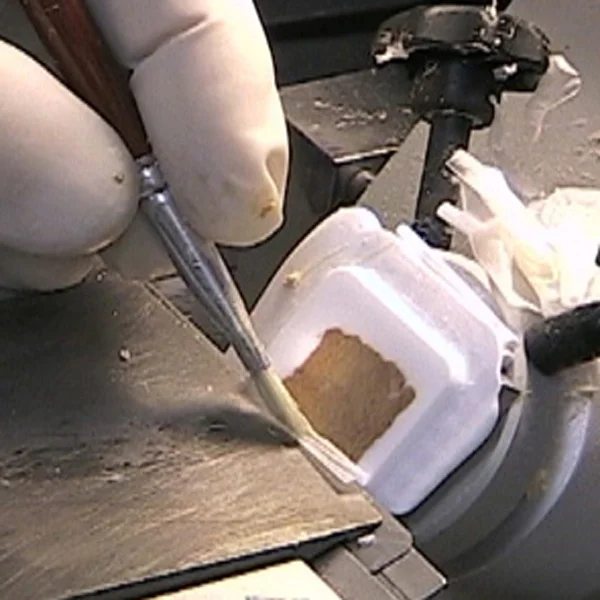
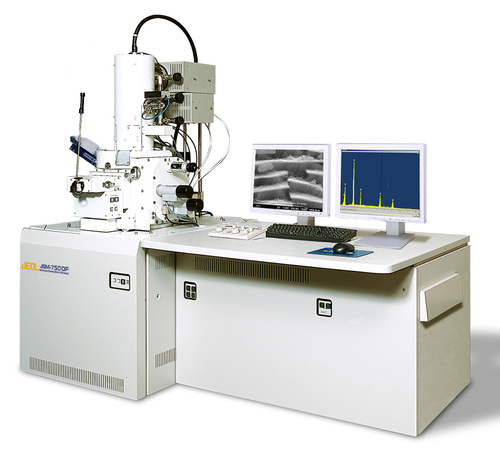
INTRODUCTION:- Electron Microscopes were developed due to the limitations of Light Microscopes which are limited by the physics of light to a resolution of about 0.2 micrometers. In the early 1930’s this theoretical limit had been reached and there was a scientific desire to see the fine details of the interior structures of organic cells (nucleus, mitochondria…etc.). This required 10,000x plus magnification which was just not possible using Light Microscopes. The Transmission Electron Microscope (TEM) was the first type of Electron Microscope to be developed and is patterned exactly on the Light Transmission Microscope except that a focused beam of electrons is used instead of light to “see through” the specimen. The electron microscope was invented in 1931 by Germans Ernst Ruska and Max Knoll. Ernst Ruska later received Nobel Prize for his work in 1986. Conventional transmission electron microscope (TEM) today can achieve a resolution of 0.05nm. TRANSMISSION ELECTRON MICROSCOPE :- The original form of electron microscope, the transmission electron microscope(TEM) is the direct counterpart of conventional light microscope. It uses a highvoltage electron beam to create an image. The electron beam is produced by anelectron gun, commonly fitted with a tungsten filament cathode as the electron source. The electron beam is accelerated by an anode typically at +100 keV (40 to 400 keV) with respect to the cathode, focused by electrostatic and electromagnetic lenses, and transmitted through the specimen that is in part transparent to electrons and in part scatters them out of the beam. When it emerges from the specimen, the electron beam carries information about the structure of the specimen that is magnified by the objective lens system of the microscope. The spatial variation in this information (the “image”) may be viewed by projecting the magnified electron image onto a fluorescent viewing screen coated with a phosphor or scintillator material such as zinc sulfide. Alternatively, the image can be photographically recorded by exposing a photographic film or plate directly to the electron beam. It is the direct counterpart of conventional light microscope. The most obvious differences between TEM and light microscope are the: the ‘light’ source, the form of the lenses and the manner in which image is formed. The Electron beam:- This is the source of ‘light’ in an EM, which can be generated by thermionic emission from a tungsten filament using an electron gun. Electrons are produced by passing a heating current through the filament.In some microscopes, the beam can be generated by field emission. Electromagnetic Lenses:– The lenses in EM are electromagnetic coils. To focus an electronic beam into a given plane, the current passing through the coil is changed. Thus the focal length of these so called lenses can be infinitely variable. Image formation:- In a light microscope, image formation occurs due differential absorption of light rays. In EM, the image is formed partly by differential absorption and partly by scattering. Scanning Electron Microscope (SEM):- The SEM is an instrument that produces a largely magnified image by using electrons instead of light to form an image. A beam of electrons is produced at the top of the microscope by an electron gun. The electron beam follows a vertical path through the microscope, which is held within a vacuum. The beam travels through electromagnetic fields and lenses, which focus the beam down toward the sample. Once the beam hits the sample, electrons and X-rays are ejected from the sample. Detectors collect these X-rays, backscattered electrons, and secondary electrons and convert them into a signal that is sent to a screen similar to a television screen. This produces the final image. Tissue Processing for Electron microscope:- To study the specimen with electron microscope, a series of processing steps are required whichare similar but different to light microscopy. The steps involved are fixation,dehydration, embedding, cutting and positive staining with heavy metals. Specimen Handling & Fixation:- The specimen must be exposed to fixative as soon as possible after interruption of blood supply. Slices of tissues about 1-2 mm thick should be cut andtransferred to a container containing fixative. The most popular method of fixation used is double fixation. It involves primary fixation in an aldehydefollowed by secondary (post) fixation in osmium tetroxide. Glutaraldehyde is the most popular aldehyde for fixation of tissues for electron microscopy as itreacts rapidly with proteins and stabilises structures by cross-linking before there is any opportunity for extraction by the buffer . Hence more ground substance of the cytoplasm (glycogen) and of the extracellular matrices is preserved. But, glutaraldehyde alone is not an adequate fixative, since certain cell components especially lipids, are not fixed and may be extracted during dehydration, therefore secondary fixation is required using osmium tetroxide. Depth ofpenetration of glutaraldehyde is 2 – 3 mm / hour and of osmium tetraoxide is 1mm/hour. Dehydration:- The aim of dehydration is to remove all the free water in the fixed tissue and replace it with a solution miscible(soluble) with embedding medium. We usually use organic solvents like methanol, ethanol or acetone. It starts with distilled water to 40% ethanol and then through a series of increasing concentrations of ethanol to 100% ethanol. Protocol for dehydration in ethanol:- 1. 40% ethanol, 5 min. 2. 70% ethanol, 10 min. 3. 90% ethanol, 10 min 4. 100% ethanol, 3 x 10 min. 5. If ethanol is miscible (soluble) with the embedding medium then tissue is directly transferred to it. Otherwise, another transitional fluid may be required.Epoxypropane is most commonly used transitional fluid. Embedding Media:- The embedding media for EM are resins, polyester resins and methacrylates. For general electron microscopy epoxy resins have most properties required. Epoxy resin Characteristics:- (a) Polyaryl ethers of glycerol with terminal epoxy groups. (b) Transparent yellowish resins which range from viscous liquids to fusiblesolids. (c) Require addition of curing agents to convert them to a tough, extremely adhesive and highly inert solid. Polymerization accomplished by the addition of various bifunctional setting groups which link with the resinto produce a three-dimensional structure. Embedding :- The embedding is carried out in polythene capsules