The Art of Exhibition (museum magic)
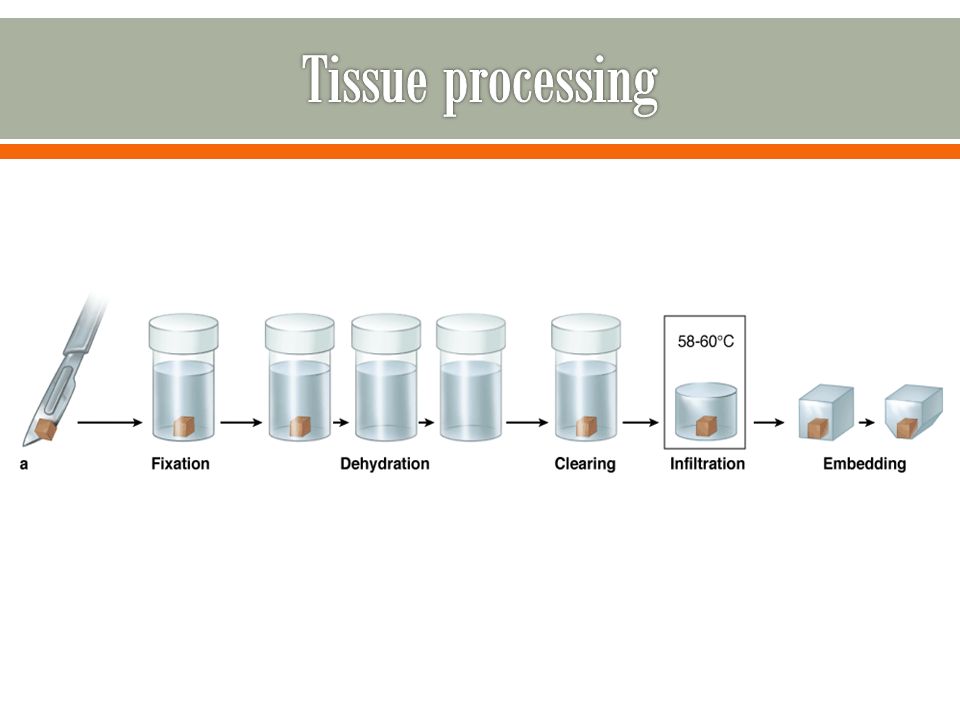
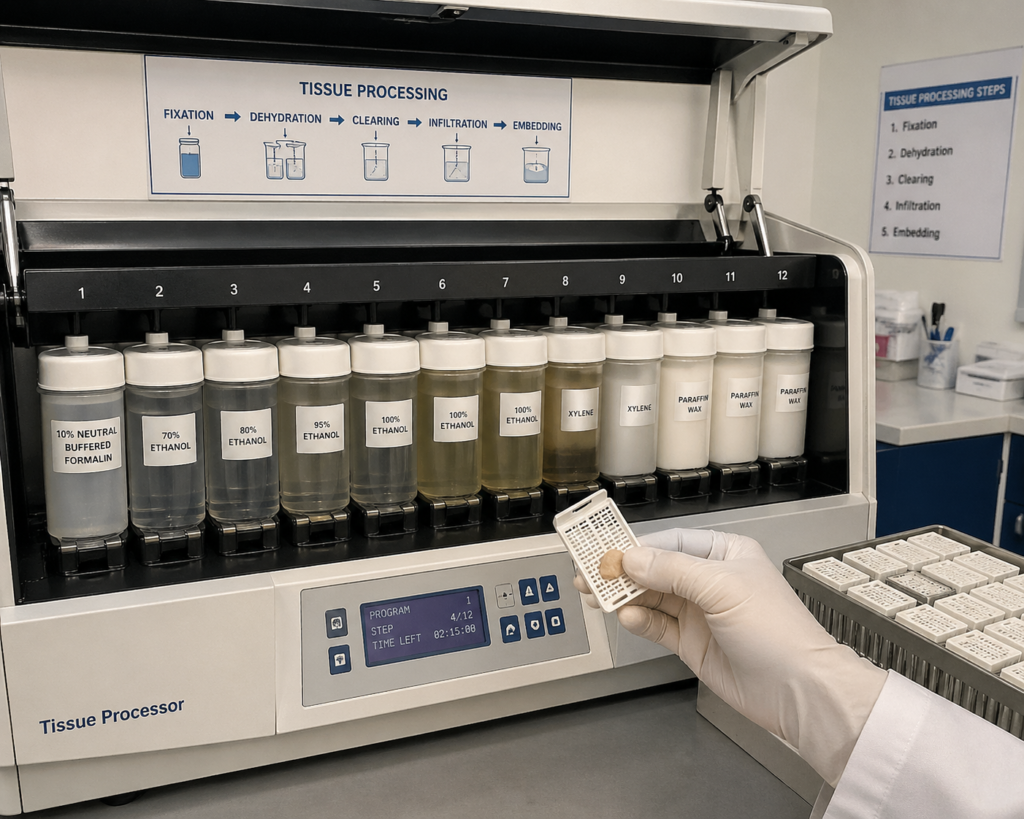
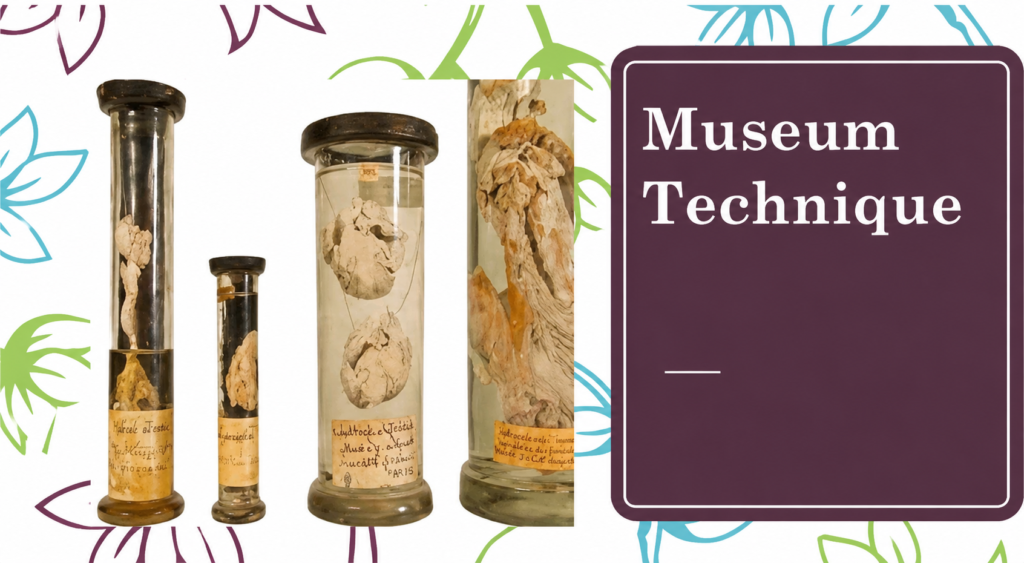
Introduction:- All teaching hospitals and colleges of Pathology have Museums which serve many functions: permanent exhibition of common specimen for undergraduate and postgraduate teaching purposes, illustrating specimens of rarity, permanent source of histologic material and for gross and microscopic photography. BASIC MUSEUM TECHNIQUES :- Any specimens for museum are handled by following steps:- 1. Reception 2. Preparation 3. Fixation 4. Restoration 5. Preservation 6. Presentation Reception of the Specimen:- Any specimen received in the museum should be recorded in a Reception book and given a number followed by year (e.g. 32/2013). This number will stay with specimen even after it is catalogued in its respective place. This number is written on tie-on type label in indelible (permanent) ink and is firmly attached or stitched to the specimen. The reception book should contain all necessary information about the specimen. Preparation of the specimen:- An ideal specimen is received fresh in unfixed state. However, it is mostly obtained from pathology laboratory after being examined, thus will already be formalin fixed. If planning to use a specimen for museum, part of it can be kept without disturbing for museum, e.g. in kidney it can be bisected and one half kept aside for museum. Fixation of the specimen:- The objective of fixation is to preserve cells and tissue constituents in as close a life-like state as possible and to allow them to undergo further preparative procedures without change. Autolysis and bacterial decomposition and stabilizes the cellular and tissue constituents. The fixatives used in museums all over the world are based on formalin fixative technique, and are derived from Kaiserling technique and his modifications. its recommended that the initial fixation be a neutral formalin (KI) solution and then transferred to a final preserving glycerin solution (KIII) for long term display. Colour preservation is also maintained with these solutions. Kaiserling’s Technique:- Fixation of specimen:- The specimen needs to be kept in a large enough container which can accommodate specimen along with 3-4 times volume of fixative. Specimen is stored in the Kaiserling I Solution for 1 month depending on the size of the specimen. The specimen should not rest on bottom or an artificial flat surface will be produced on hardening due to fixation. Kaiserling I Solution:- Formalin 1L Potassium acetate 45 g Potassium nitrate 25 g. Distilled water Make up to 10 litres. Restoration of specimen:- It is required to restore the specimens, as they lose their natural color on fixation.The recommended method is the Kaiserling II method. It involves removing the specimen, washing it in running water and transferring to 95% alcohol for 10 minutes to 1hour depending on the size of specimen. The specimen is then kept and observed for color change for around 1- 1.5 hrs. After this step, specimen is ready for preservation. Kaiserling II Solution:- Alcohol 95% *Store specimen in this solution for 10 minutes to 1 hour depending on size of specimen. Rejuvenator Solution:- Pyridine 100 ml Sodium hydrosulphite 100 gm Distilled water 4 liters *Formalin decreases the natural colour of the specimen. However, rejuvenator solution restores the colour. Preservation of specimen:- The recommended solution for this step is Kaiserling III. This is the final solution in which the specimen will remain for display. It is based on glycerine solution. Kaiserling III Solution:- Potassium acetate 1416 g. Glycerine 4 liters Distilled water make up to litres Thymol crystals added to prevent moulds. * Leave solution to stand for 2 – 3 days before using to ensure proper mixing of chemicals. Add 1% pyridine as stabilizer. This solution acts as permanent fixative. This solution easily turns yellowish and needs to be replaced to restore colour of the specimen. The specimen will initially float to surface but later sink to bottom. Presentation of the Specimen:- Initially all museum specimens were mounted in cylindrical jars and sealed with sheep bladder walls. Later they were replaced by rectangular glass jars. They were better than cylindrical ones as the flat surfaces afforded a clear view of specimens without any distortion. They are covered by rectangular glass plates. These jars can be purchased readymade or assembled in museum itself, as per need. Nowadays, Perspex jars are also available, which are lighter than glass jars. However, they cannot be used to store specimens fixed in alcohol or methyl salicylate as they react with plastics. Mounting the Specimens:- To support the specimen within its jar, it is attached to the specimen plate or rectangular bent glass rods. It can be done by tying the specimen with nylon threads. Double knots should be made by threads, on the specimen surface. -:Museum specimens of cardiovascular system:- l