Uncategorized
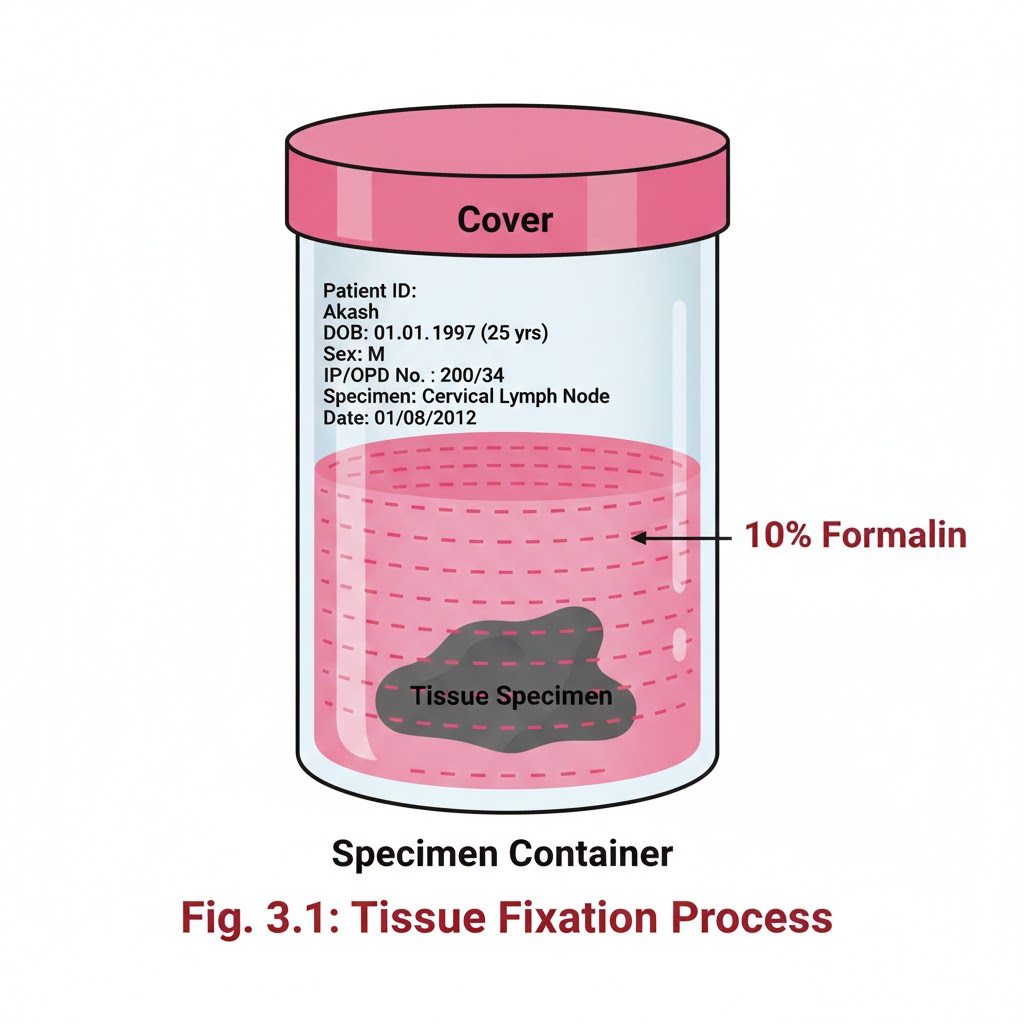
FIXATION OF TISSUES
Introduction:- It is a process by which the cells or tissues are fixed in chemical and partly physical state so that they can withstand subsequent treatment with various reagents, with minimal distortion of morphology and no decomposition OBJECTIVES:- After reading this lesson, you will be able to: *state the aims of fixation *explain the principle of fixation *describe the properties and factors affecting fixation *explain types of fixation. AIMS OF FIXATION:- (a) To preserve the tissues as close to their living state as possible (b) To prevent autolysis and bacterial attack (c) To prevent tissues from changing their shape and size during processing (d) To harden the tissues (e) To allow clear staining of sections subsequently (f) To improve the optical differentiation of cells & tissue. PRINCIPLE OF FIXATION:- Fixation results in denaturation and coagulation of protein in the tissues. The fixatives have a property of forming cross links between proteins, thereby forming a gel, keeping everything in their in vivo relation to each other. PROPERTIES OF FIXATIVES AND FACTORS AFFECTING FIXATION:-1. Coagulation and precipitation of proteins in tissues. 2. Penetration rate differs with different fixatives depending on the molecular weight of the fixative 3. pH of fixatives – Satisfactory fixation occurs between pH 6 and 8. Outside this range, alteration in structure of cell may take place. 4. Temperature – Room temperature is alright for fixation. At high temperature there may be distortion of tissues. 5. Volume changes – Cell volume changes because of the membrane permeability and inhibition of respiration. 6. An ideal fixative should be cheap, nontoxic and non-inflammable. The tissues may be kept in the fixative for a long time.TYPE OF FIXATION:-*Immersion fixation *Perfusion fixation *Vapour fixation *Coating/Spray fixation *Freeze drying *Microwave fixation/StabilizationThe most commonly used technique is simple immersion of tissues/smears in an excess of fixative. For all practical purposes immersion fixatives are most useful. These may be divided into routine and special. SIMPLE FIXATIVES:-1. Formaldehyde: Commercially available solution contains 35%-40% gas by weight, called as formalin. Formaldehyde is commonly used as 4% solution, giving 10% formalin for tissue fixation. Formalin is most commonly used fixative. It is cheap, penetrates rapidly and does not over- harden the tissues. The primary action of formalin is to form additive compounds with proteins without precipitation. Formalin brings about fixation by converting the free amine groups to methylene derivatives If formalin is kept standing for a long time, a large amount of formic acid is formed due to oxidation of formaldehyde and this tends to form artefact which is seen as brown pigment in the tissues. To avoid this buffered formalin is used. 2. Absolute alcohol – it may be used as a fixative as it coagulates protein. Due to its dehydrating property it removes water too fast from the tissues and produces shrinkage of cells and distortion of morphology. It penetrates slowly and over-hardens the tissues.3. Acetone:-Sometimes it is used for the study of enzymes especially phosphatases and lipases. Disadvantages are the same as of alcohol. 4. Mercuric chloride:- It is a protein precipitant. However it causes great shrinkage of tissues hence seldom used alone. It gives brown colour to the tissues which needs to be removed by treatment with Iodine during dehydration. 5. Potassium dichromate:- It has a binding effect on protein similar to that of formalin. Following fixation with Potassium dichromate tissue must be well washed in running water before dehydration. 6. Osmic acid :- It is used for fixation of fatty tissues and nerves.7. Chromic acid:- It precipitates all proteins and preserves carbohydrates. Tissues fixed in chromic acid also require thorough washing with water before dehydration. 8. Osmium tetraoxide:- It gives excellent preservation of cellular details, hence used for electron-microscopy. 9. Picric acid – It precipitates proteins and combines with them to form picrates. Owing to its explosive nature when dry; it must be kept under a layer of water. Tissue fixed in picric acid also require thorough washing with water to remove colour. Tissue can not be kept in picric acid more than 24 hrs. COMPOUND FIXATIVES:- 1. Formal saline:-It is most widely used fixative. Tissue can be left in this for long period without excessive hardening or damage. Tissues fixed for a long time occasionally contain a pigment (formalin pigment). This may be removed in sections before staining by treatment with picric alcohol or 10% alcoholic solution of sodium hydroxide. The formation of this pigment can be prevented by neutralizing or buffering the formal saline.Fixation time – 24 hours at room temprature2. Formal calcium:-Useful for demonstration of phospholipids. Fixation time-24 hours at room temperature3. Zenker’s fluid:-It contains mercuric chloride, potassium-di-chromate, sodium sulphate and glacial acetic acid.Advantages :-even penetration, rapid fixationDisadvantages –After fixation the tissue must be washed in running water to remove excess dichromate. Mercury pigment must be removed with Lugol’s iodine.4. Zenker’s formal (Helly’s fluid):-In stock Zenker’s fluid, formalin is added instead of acetic acid.Advantages :- excellent microanatomical fixative especially for bone marrow, spleen & kidney.5. Bouins fluid :-It contains picric acid, glacial acetic acid and 40% formaldehyde.Advantages :-(a) Rapid and even penetration
special light microscope
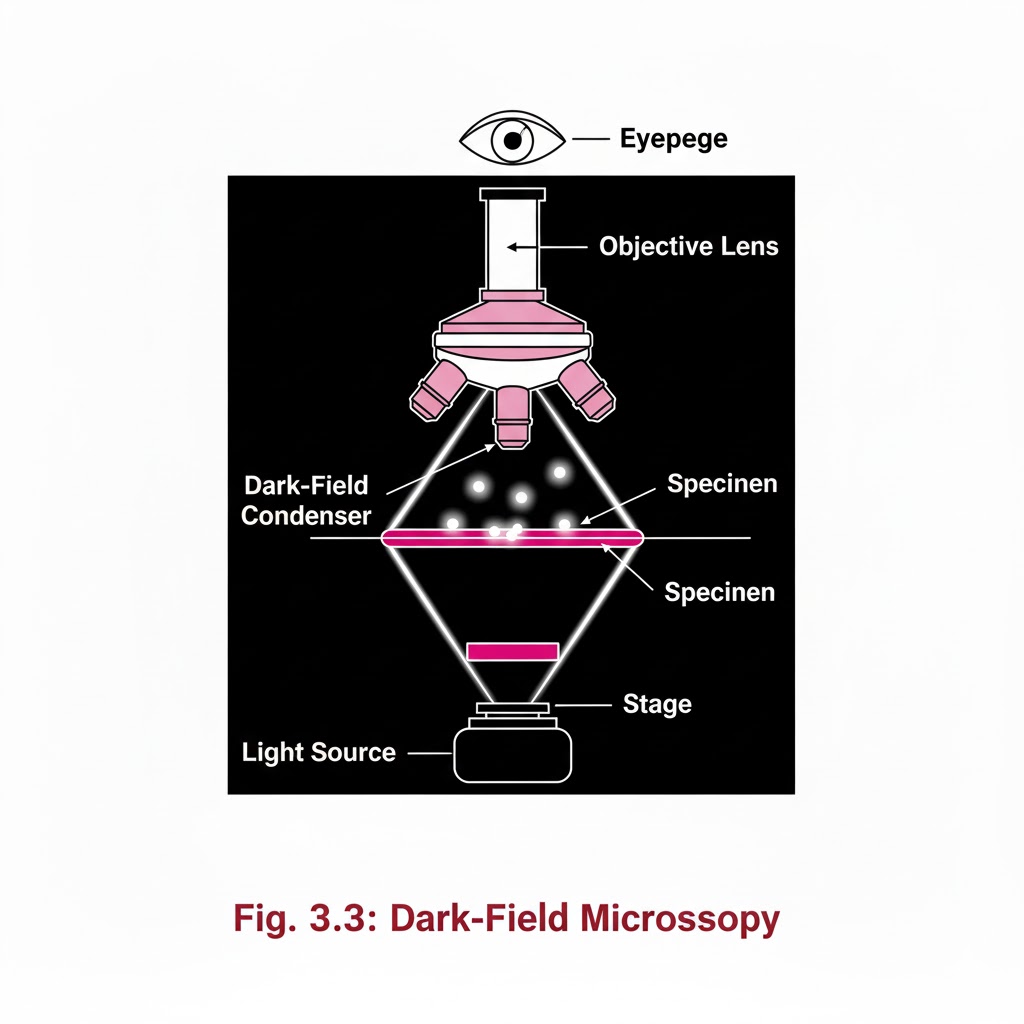
Introduction:- Special Light Microscope refers to advanced microscopic techniques used to examine specimens that cannot be clearly observed under a simple compound microscope. Microscopes are instruments designed to produce magnified visual or photographic images of objects too small to be seen with the naked eye. A microscope must accomplish three tasks: produce a magnified image of the specimen, separate the details in the image, and render those details visible to the human eye or camera. Compound microscopes are suitable for examination of stained preparations, but for special conditions we require a Special Light Microscope such as dark-ground, phase contrast, polarizing, and immunofluorescence microscopes. Objectives of Special Light Microscope After reading this lesson, you will be able to: *describe the principle of Dark-ground, phase contrast, polarizing and immunofluorescence microscopy. *explain the uses of Dark-ground, phase contrast, polarizing and immunofluorescence microscopy. DARK GROUND ILLUMINATION:- Conditions arise when specimen need to be visualized as unstained or living cells. Since such specimens have refractive indices close to medium in which they are suspended, bright field microscopy is difficult as there is not much contrast. Principle:- Dark ground microscopy prevents direct light from entering the front of the objective, only light which enters is which gets reflected or diffracted by the specimen, thus making them appear bright in a dark background . Uses of Dark ground microscopy::- Useful for spirochaetes, flagellates, cell suspensions, flow cell techniques, parasites, autoradiography, and fluorescence microscopy. Disadvantage: Resolution is inferior to bright field microscopy. Does not reveal internal details PHASE CONTRAST MICROSCOPY:- Unstained and living biological material viewing by bright field and dark ground illumination has problems of reduced illumination and resolution. To overcome these problems, phase contrast microscopes are used. Principle: It is an optical microscopy illumination technique that converts phase shifts in light passing through a transparent specimen to brightness changes in the image. The phase shifts themselves are invisible to the human eye, but become visible when they are shown as brightness changes. A practical implementation of phase-contrast illumination consists of a phase ring (located in an aperture plane located somewhere behind the front lens element of the objective) and a matching annular ring, which is located in the conjugate primary aperture plane Two selected light rays, which are emitted from one point inside the lamp’s filament, are focused by the field lens exactly inside the opening of the condenser annular ring. Since this location is precisely in the front focal plane of the condenser, the two light rays are then refracted in such way that they exit the condenser as parallel rays. Assuming that the two rays in question are neither refracted nor diffracted in the specimen plane (location of microscope slide), they enter the objective as parallel rays. Since all parallel rays are focused in the back focal plane of the objective, the back focal plane is a conjugate aperture plane to the condenser’s front focal plane (also location of the condenser annulus). To complete the phase setup, a phase plate is positioned inside the back focal plane in annulus Uses: It’s a quick and efficient way of examining unstained paraffin, resin and frozen sections, studying living cells (cell cultures) and their behavior. POLARIZED LIGHT MICROSCOPY:- Light can be described as an electromagnetic vibration where there are many planes of vibration. Natural light vibrates in many planes or directions, whereas polarized light vibrates in only one plane. It can be produced by passing light through a polarizer. Substances capable of producing polarized light are called birefringent. Principle: The dedicated polarizing microscope uses two polarizers. One, always referred to as polarizer, is placed beneath the substage condenser. The other is called analyzer and is placed between the objective and the eyepiece. Looking through both polarizers, the light intensity is best when they are both giving light vibrating parallel to each other. However, when the light vibration is at right angles to each other, there is dark background. If a substance capable of birefringence is placed between the two polarisers it gets visualized as brightness against a black background. Uses: Medicine-Amyloid detection, collagen fibers, urates and other crystals.Metallurgy, Ceramics. FLUORESCENCE MICROSCOPY:- Principle: Fluorescence is the property of some substances which, when illuminated by light of a certain wavelength, will re-emit the light at a longer wavelength. In fluorescence microscopy, the exciting radiation is usually ultra violet wavelength or blue region. A substance which possesses a fluorophore will fluoresce naturally (Primary or autofluorescence) eg Vitamin A, chlorophyll Dyes, chemicals and antibodies added to tissues produce secondary fluorescence of structures and are called fluorochromes. When antibodies labeled with fluorochromes are used to detect particular antigens, the technique is called Immunofluorescent technique and is widely used in medicine. Tissue antigens most commonly demonstrable by Immunofluorescence are viruses, protozoa, bacteria, enzymes, hormones, plasma proteins, cells and cell constituents. Examples of fluorochromes: Fluorescein (apple green emission color), Rhodamine (Orange-red color
Introduction of histopathology
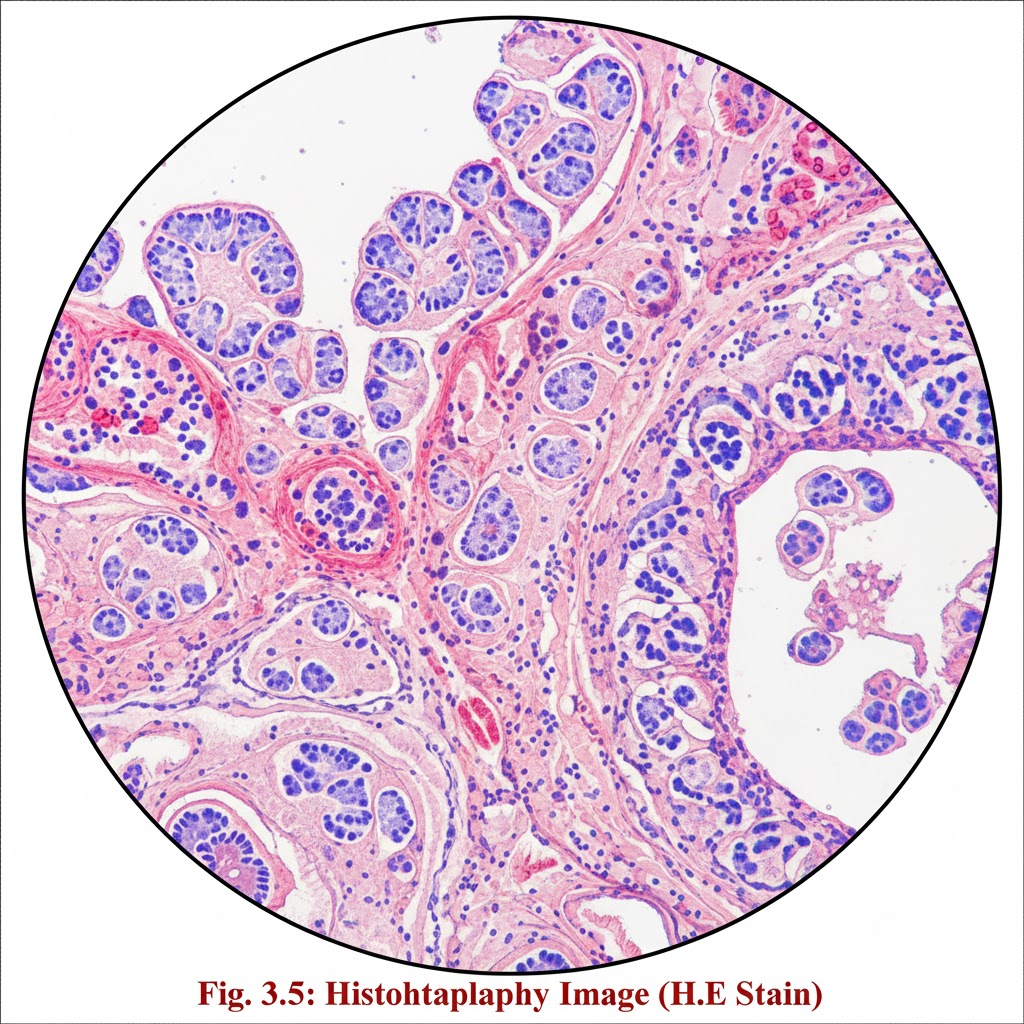
Introduction:- Surgical pathology includes gross and microscopic examination of resected specimens and biopsies by histopathologists for tissue diagnosis. Several steps are followed to get the tissue in a form, by which diagnosis can be made under light microscope Objective:- After reading this lesson, you will be able to: list the steps involved in the processing of surgical specimens for histopathologic examination explain the after care of the specimens explain grossing and gross room describe the laboratory hazards and safety measures. Steps involved in the process are 1. Receipt of specimens from OT 2. Grossing 3. Tissue processing 4. Embedding 5. Section cutting 6. Staining and labelling 7. Dispatch of slides to pathologist for diagnosis
CROSS MATCH
CROSS MATCH Cross matching is a laboratory test that checks the compatibility between the donor’s red blood cells (RBCs) and the recipient’s serum(plasma). it helps to prevent transfusion reactions caused by antibodies in the recipient attacking donor red blood cells. or cross match is the final compatibility test is performed in a blood bank to ensure that a patient blood is compatible with a donor blood before transfusion. If blood is compatible with recipient blood after cross matching, then donor can donate blood. if not compatible then donor cannot donate blood. The cross match is a final check reverse and forward. In 1907 first time Hekaton he just proposes cross match. In 1908 Ottenberg first time use cross match for blood transfusion in New York. Procedure: – *Make 5% cell suspension for both donors and recipients. *Take two clean and dry test tubes and mark as major and minor cross match. *Add 50µl donor cell suspension (antigen)and 25µl serum (antibody)of recipient for major cross match. *Add 50µl cell suspension of recipient and 25µl serum of donor for minor cross match. *Mix well and incubate for 30 minutes at 37°c *After incubation observe microscopically and macroscopically Observation: – If agglutination shows, then blood is not compatible for recipient. If agglutination is not shown, then the blood is compatible for recipient. Cross match by micro gel tube method: – The micro gel tube method, also called the gel card method, is a modern and reliable technique used in blood bank to perform cross matching between donor and recipient blood. It helps ensure that compatibility before transfusion, preventing transfusion reactions. Principle: – The gel microcolumn contains antiglobulin reagent (coombs reagent) or other media that trap agglutinated red cells during centrifugation. Agglutinated(incompatible)red cells are trapped in the gel. Non agglutinated(compatible) red cells pass through the gel and settle at the bottom. It detects antigen-antibody reactions between donor red cells and recipient serum/plasma. Requirement: – Gel card (antiglobulin gel microtube card) Sample (both donor and recipient) Micropipette and tips Centrifuge (specific for gel cards) Incubator Procedure: – Prepare 2-5% suspension of donor red cells in normal saline. Add 50µl of recipient serum/plasma into the designated microtube of gel card. Add 25µl of donor red cell suspension to the same microtube. Incubate the card at 37°c for 15-30 minutes (to allow antigen-antibody reaction). Centrifuge the card in a gel card centrifuge for 10 minutes. Observe the position of red cells in the gel column. Interpretation or Results: – If red cells are forming a band at the top or dispersed in the gel then result positive means agglutination occurred, blood is incompatible. If red cells are forming a pellet at the bottom of the microtube (or RBC settle down in bottom of microtube) then result negative means agglutination does not occur, blood is compatible. If mixed pattern means some cells are trapped, or on top and some at bottom then result weak positive show incompatibility (possible minor).
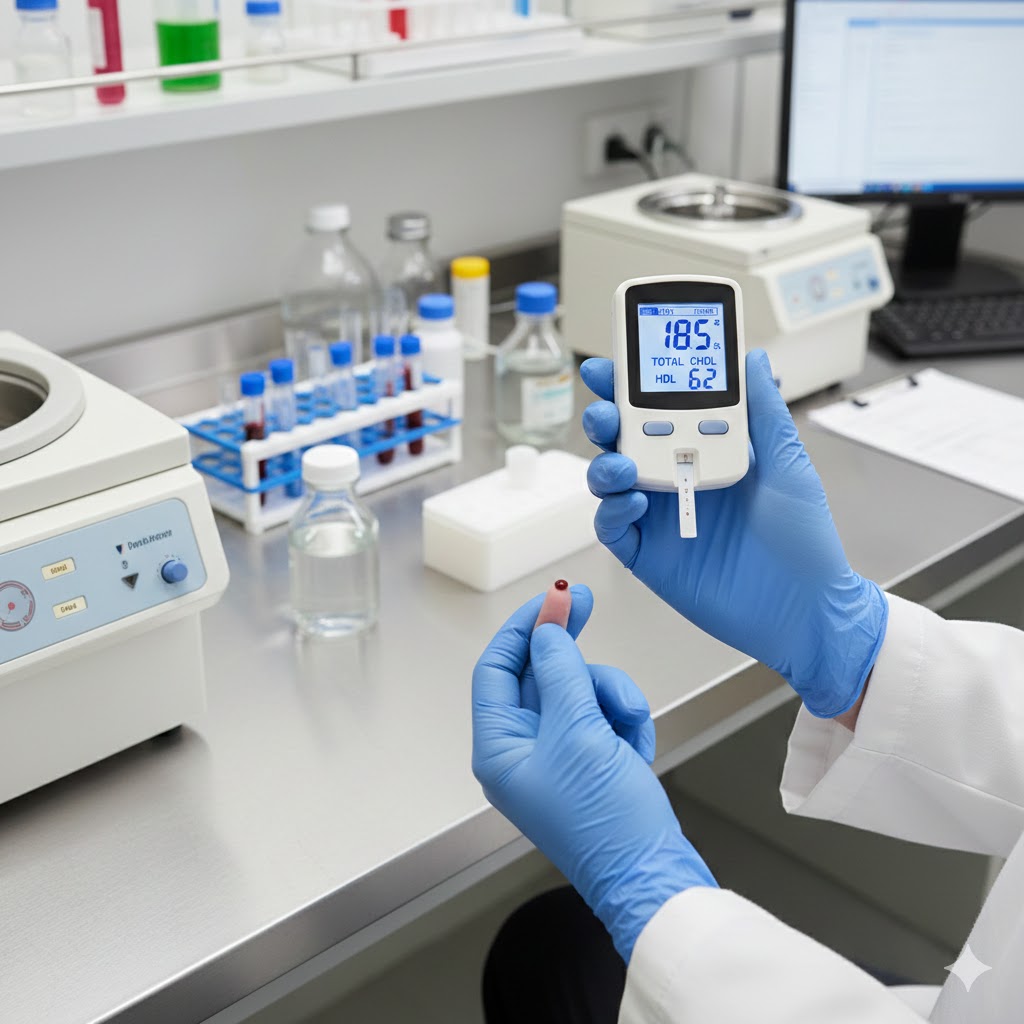
HDL CHOLESTROL
HDL CHOLESTEROL DIRECT REAGENT KIT BEACON INTENDED USE: The reagent is intended for the direct in-vitro quantitative determination of HDL cholesterol in human serum. PRINCIPLE: The direct HDL cholesterol assay is a homogeneous method for directly measuring serum HDL. Using selective detergents and enzymatic reaction, HDL cholesterol is measured without interference from LDL, VLDL and chylomicrons. The cholesterol esterase and cholesterol oxidase react with HDL cholesterol to form a colored quinoneimine dye whose intensity is proportional to the HDL cholesterol concentration. Reaction: HDL-C + Esterase → Cholesterol + Fatty acidsCholesterol + Oxidase → Cholestenone + H₂O₂H₂O₂ + Chromogen → Colored quinoneimine CONTENTS: Reagent 1: R1 Reagent 2: R2 Standard: HDL Cholesterol Calibrator MATERIALS REQUIRED BUT NOT PROVIDED: Laboratory glassware Micropipettes & tips Autoanalyzer / Semi-auto analyzer STORAGE AND STABILITY: The reagents are stable up to the expiry date stated on the label when stored at 2–8°C. Do not freeze. SAMPLES: Serum, Plasma (Heparin) PREPARATION OF REAGENTS & STABILITY: The reagent is ready to use. Calibrator: Reconstitute with distilled water. Let stand for 10 minutes, mix gently. Working reagent is stable for 7 days at 2–8°C. PROCEDURE: Blank Calibrator Sample R1 Reagent 450 µl 450 µl 450 µl Calibrator — 5 µl — Sample — — 5 µl R2 Reagent 150 µl 150 µl 150 µl Mix and incubate at 37°C for 5 minutes. Measure absorbance at 578 nm against reagent blank. CALCULATION: HDL-C = Abs of Sample/ Abs of Calibrator ×Calibrator concentration NORMAL VALUE: Male: ≥ 40 mg/dL Female: ≥ 50 mg/dL (Values may vary depending on population and laboratory.) CLINICAL SIGNIFICANCE: Lipoproteins are particles with many transport fats in blood plasma. There are two groups: low density lipoprotein (LDL) cholesterol and high density lipoprotein (HDL) cholesterol. LDL cholesterol is mainly triglycerides, though LDL is also transport some amount of cholesterol. LDL causes cholesterol to be deposited in blood vessels and cause atherosclerosis. HDL cholesterol removes cholesterol from blood and transports it back to the liver for excretion. HDL is considered “good cholesterol” as higher levels are associated with lower risk of heart disease. Estimation of HDL cholesterol is useful for the risk assessment of coronary heart disease. GENERAL SYSTEM PARAMETERS: Reaction Type: End point Wavelength: 578 nm (540–620 nm) Temperature: 37°C Reaction Volume: R1 450 µl + R2 150 µl Sample Volume: 5 µl Measuring: Against blank Linearity: 5–150 mg/dL Calibration: Single point Reaction Time: 5 minutes LINEARITY: This procedure is linear up to 150 mg/dL. If values exceed this limit, dilute the sample with saline and repeat the assay. QUALITY CONTROL: Use recommended commercial quality control sera with each run. Results should fall within acceptable limits.
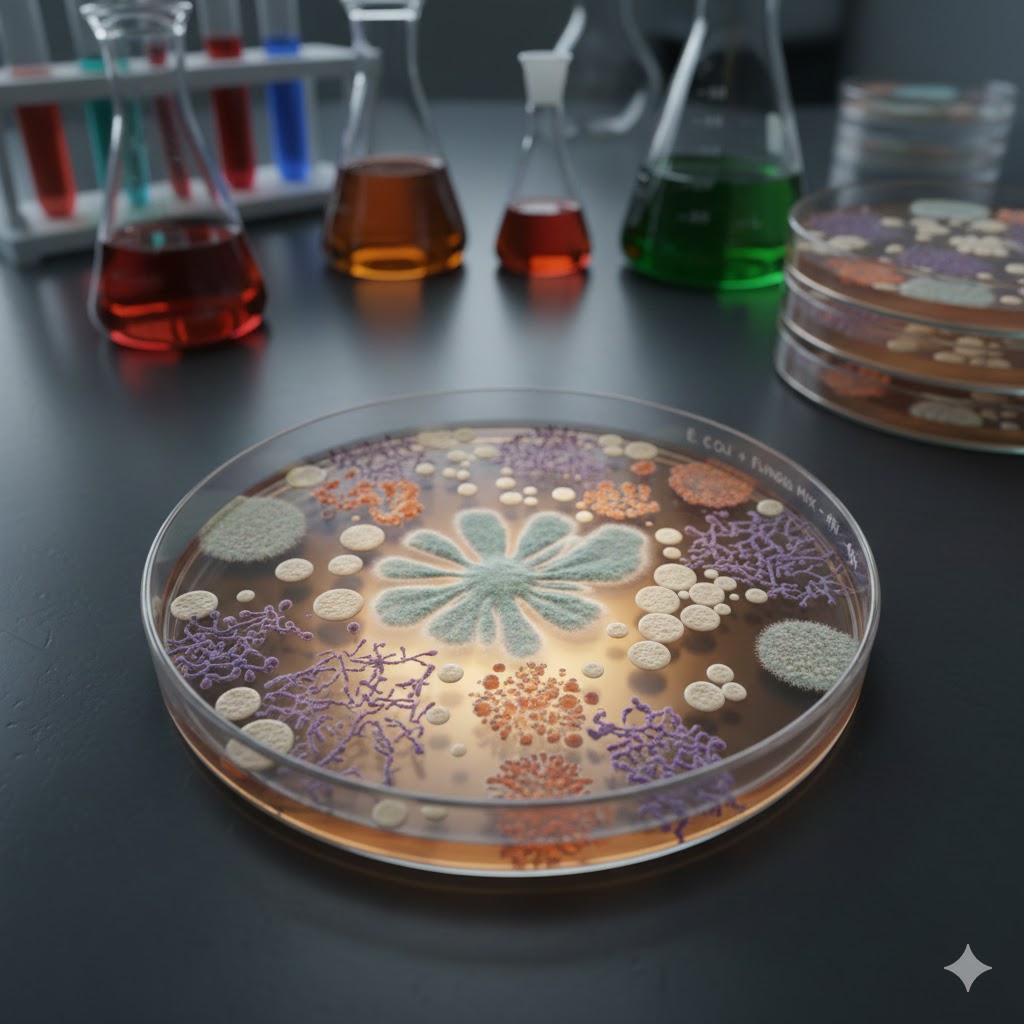
INTRODUCTION OF MICROBIOLOGY
“Microbiology Worlds” Microbiology is the scientific study of microorganisms, which are microscopic living organisms that include bacteria, viruses, fungi, and protozoa. These microorganisms play a crucial role in various biological processes and have a significant impact on human health, agriculture, industry, and the environment. French chemist and Microbiologist Louis Pasteur (1822-1895) coined the term “microbiology”. He used the term to describe his work with organisms at the microscopic level. The field of microbiology has a rich history that spans several centuries, with important discoveries and developments contributing to our understanding of the microbial world. Historical Background of Microbiology:- 1.0Aristotle (384-322 BC):- The concept of spontaneous generation was proposed by various ancient civilizations and philosophers, including the ancient Egyptians and Greeks. One of the most notable proponents of spontaneous generation in ancient times was the Greek philosopher Aristotle. He proposed the idea that certain animals, insects, and even mice could arise spontaneously from decaying organic matter. In the Middle Ages, spontaneous generation was further supported by prominent figures such as Avicenna and Albertus Magnus. 2.0 Anton van Leeuwenhoek (1632 – 1723):- Anton van Leeuwenhoek made significant contributions to the field of microbiology, earning him the title of the “father of microbiology & Protozoology.” Here are some of his key contributions: 1. Discovery of Microorganisms: In the 17th century, Leeuwenhoek designed powerful single-lens microscopes, enabling him to observe tiny organisms that were previously invisible to the human eye. He was the first to describe and document various microorganisms, including bacteria, protozoa, and other microscopic life forms. In 1676 Observations of bacteria, which he called “animalcules,” provided crucial evidence against the theory of spontaneous generation. 2.. Microscopic Studies of Biological Samples: Leeuwenhoek examined a wide range of biological samples, including water, dental plaque, and even his own feces. 3. Advancements in Microscopy: Leeuwenhoek’s innovative improvements to microscope design, including using high-quality lenses and precise grinding techniques, significantly enhanced the magnification and clarity of his observations. 4.. The term “microbe” was first used by Sedillot in 1878. The word comes from the Greek words “mikros” meaning “small” and “bios” meaning “life”. It literally means “small life” or “microscopic life”. 3.0 Francesco Redi (1626-1697):- Francesco Redi was an Italian physician, naturalist, and poet who made significant contributions to the field of microbiology, particularly in the context of spontaneous generation, which was the widely held belief at the time, that living organisms could arise from non-living matter. Redi conducted a series of experiments that challenged this idea, providing evidence against spontaneous generation Francesco Redi experiments:- In 1668, Redi conducted a famous experiment to test the hypothesis that maggots (the larvae of flies) spontaneously generated from decaying meat. He set up three groups of jars, each containing decaying meat. One group was left open, allowing flies to access the meat and lay eggs, another group was covered with gauze, preventing flies from touching the meat but allowing air to pass, and the third group was completely sealed. Redi observed that maggots only appeared in the open jars, where flies could access the meat, and not in the covered or sealed jars. This experiment provided strong evidence against spontaneous generation, demonstrating that maggots only appeared when flies were able to lay their eggs on the decaying meat. 4.0 John Needham (1713 – 1781): In 1745, Needham conducted experiments where he heated nutrient broths and then sealed them in flasks. Afterward, he observed the growth of microorganisms in the sealed flasks and concluded that life could arise spontaneously from non-living matter. 5.0 Lazzaro Spallanzani (1729 – 1799):- Lazzaro Spallanzani Disproving Spontaneous Generation Theory and support Biogenesis Theory. In 1765, Lazzaro Spallanzani conducted experiments where he boiled nutrient-rich broth in sealed containers, effectively sterilizing the broth. His experiments showed that no microorganisms grew in the sealed flasks, even after long periods, unless they were exposed to air. This demonstrated that living organisms did not arise spontaneously but were introduced to the broth from the external environment. 6.0 Louis Pasteur (1822 – 1895): Louis Pasteur made several significant contributions to the field of microbiology, , earning him the title of the “father of Medical microbiology.” He coined the term “microbiology”, Aerobic and Anaerobic. 1. Disproving Spontaneous Generation: Pasteur conducted experiments that disproved the prevailing notion of spontaneous generation 2. Germ Theory of Disease: Germ theory states that microorganisms are the cause of many diseases 3. Pasteurization: Pasteurization is a heat treatment process developed by Louis Pasteur to kill or deactivate harmful microorganisms in food and beverages, such as milk and wine. 4. Vaccination: He developed vaccines against several diseases, including rabies and anthrax. 5.Fermentation: Chemical process by which molecules such as glucose are broken down anaerobically 7.0 John Tyndall:- John Tyndall was a prominent 19th-century Irish physicist and naturalist who made significant contributions to the field of microbiology, particularly in the areas of sterilization.. 1.Tantalization: Tyndall developed a process known as Tantalization, which involves intermittent sterilization through boiling, incubation, and e-boiling. This method was used to kill heat-resistant bacterial spores and became an important technique in microbiology for ensuring the elimination of spore-forming bacteria in culture media and other substances. 2. He Discovered highly resistant bacterial structure, later known as endospore. 8.0 Lord Joseph Lister:- Lord Joseph Lister, a British surgeon, is widely regarded as the pioneer of antiseptic surgery. He is also known as father of Antiseptic Surgery. His contributions to microbiology and healthcare have had a profound impact on the field, here are some key contributions of Lord Joseph Lister in microbiology. 1. Introduction of Antiseptic Techniques 2….Impact on Infection Control 9.0 Robert Koch (1843 – 1910): Robert Koch, a German physician and microbiologist, made significant contributions to the field of microbiology, particularly in the areas of medical microbiology and infectious diseases. Koch’s Postulates: Koch formulated a set of postulates in the late 19th century that are used to demonstrate the association between a specific microorganism and a particular disease. These postulates are still considered fundamental in the field of microbiology and are
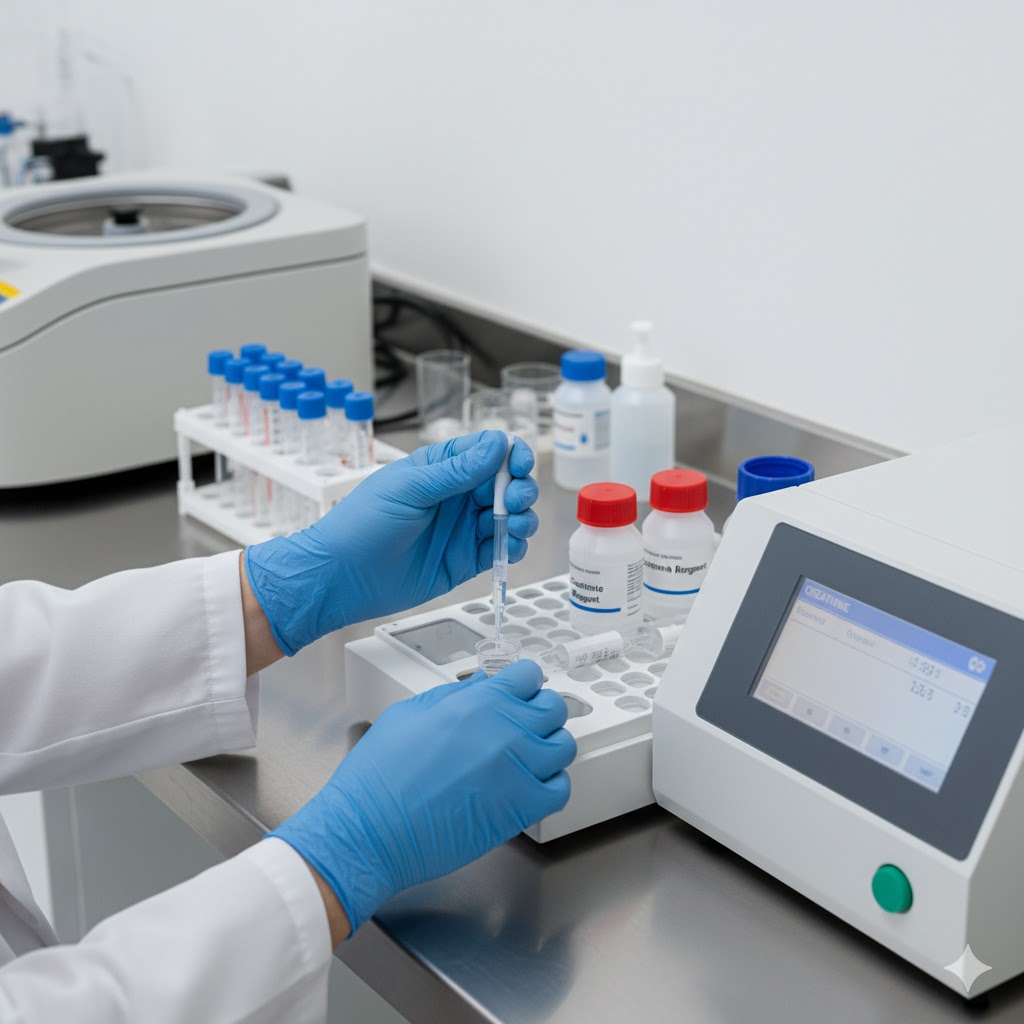
CERATININE
CREATININE REAGENT KIT (Alkaline Picrate Method) INTENDED USE This reagent kit is used for the in vitro quantitative determination of creatinine in serum and urine. SUMMARY Creatinine is the end product of creatine phosphate metabolism in muscles. It is excreted in urine.Serum creatinine level helps assess kidney (renal) function.Elevated creatinine indicates renal impairment, muscle damage, or muscular dystrophy. PRINCIPLE Creatinine reacts with alkaline picrate to form an orange-colored complex.The intensity of the color is directly proportional to the amount of creatinine present and is measured spectrophotometrically at 520 nm. Reaction:Creatinine + Alkaline Picrate → Orange-Coloured Complex CONTENTS Reagent 1: Creatinine Buffer Reagent Reagent 2: Creatinine Standard Reagent Reagent 3: Creatinine Picrate Reagent MATERIALS REQUIRED Clean dry glassware Micropipettes & tips Colorimeter or Spectrophotometer Test tubes SPECIMEN Use serum or urine. Serum should be diluted (1:100) in saline. PREPARATION OF REAGENT & STABILITY Reagents are supplied ready-to-use. Store at 2–8°C. Working reagent is stable for 7 days at room temperature (R.T.) or 1 month at 2–8°C. PROCEDURE Pipette into Test Tubes Blank Standard Test Working Reagent 1.0 ml 1.0 ml 1.0 ml Standard – 0.1 ml – Sample – – 0.1 ml Mix well and read absorbance (A) of the Standard and Test after 30 seconds and again after 90 seconds at 520 nm. Distilled water is used as Blank. CALCULATION Creatinine (mg/dL)=ATAS×2text{Creatinine (mg/dL)} = frac{A_T}{A_S} times 2 Creatinine (mg/dL)=ASAT×2 Urine Creatinine (g/L)=ATAS×2×Dilution factortext{Urine Creatinine (g/L)} = frac{A_T}{A_S} times 2 times text{Dilution factor} Urine Creatinine (g/L)=ASAT×2×Dilution factor Where:Aₛ = Absorbance of StandardAₜ = Absorbance of Test NORMAL VALUES Serum: Male – 0.6–1.4 mg/dL; Female – 0.6–1.2 mg/dL Urine (24 hours): 1.0–2.0 g/24 hr (Note: Values may vary by method and laboratory.) QUALITY CONTROL Use normal and abnormal serum controls to check assay performance. LIMITATION & PRECAUTIONS Avoid hemolysed samples. Maintain precise timing and temperature. Do not use reagents after expiry date. For in vitro diagnostic use only.
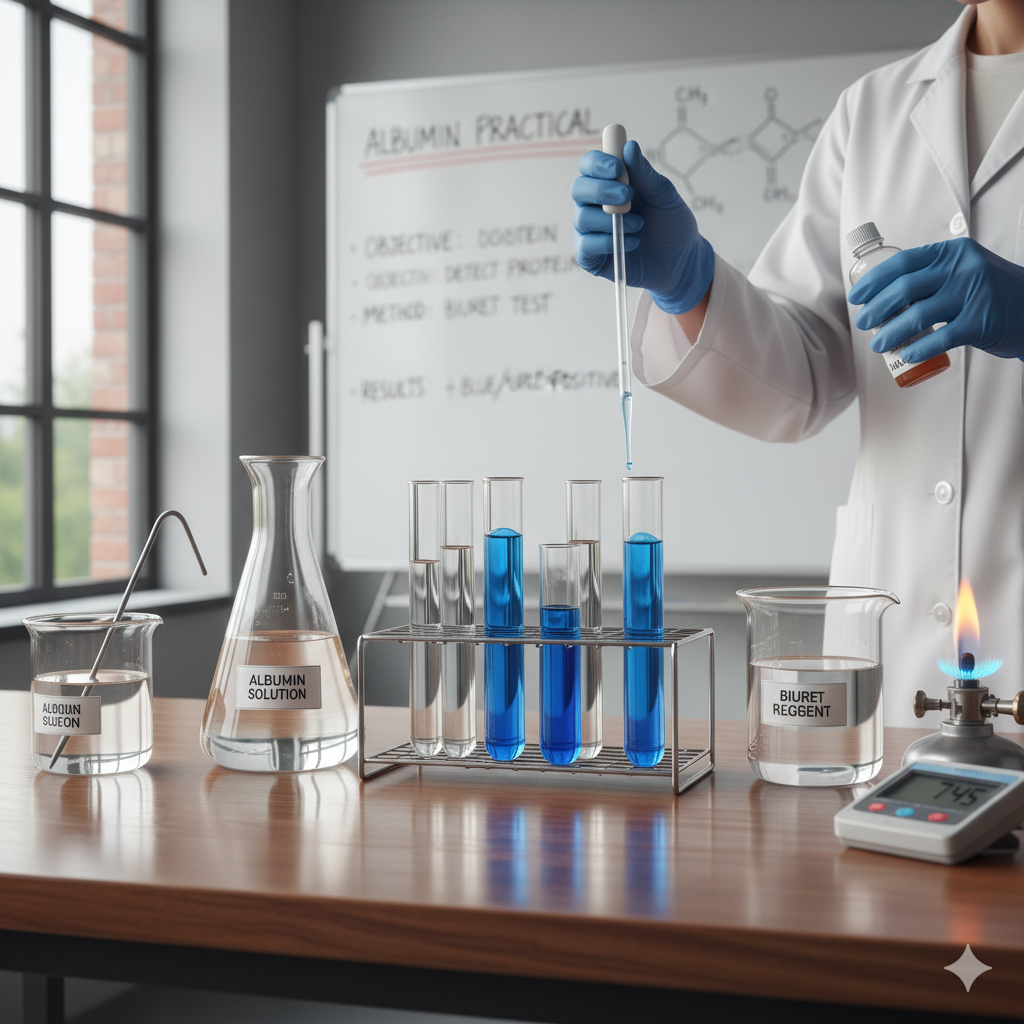
SERUM ALBUMIN
SUMMARY: Albumin a major plasma protein is synthesized in the liver from amino acids, which are absorbed from the liver. Its function includes regulation of distribution of extracellular fluid, transportation of various hormones, steroids, and amino acids. Aim: Estimation of Serum Albumin by BCG (Bromocresol Green) method. PRINCIPLE: Albumin binds with bromocresol green at pH 4.2 causing a shift in absorbance maximum of the Yellow BCG dye. The resulting bluish-green color is measured photometrically. The intensity of the color is directly proportional to the albumin concentration. The absorbance of the test and standard are measured against blank at 630 nm wavelength. Albumin + BCG → Albumin-BCG complex (blue-green color) REQUIREMENTS: Three test tubes Colorimeter with Automatic Pipetter Total Protein working reagent Distilled water Cuvette Pipette Serum Sample PROCEDURE: Contents Blank (ml) Standard (ml) Test (ml) Working reagent 1.0 1.0 1.0 Distilled water 1.0 – – Standard – 0.1 – Serum – – 0.1 For further help WhatsApp us: +91-9891068072 INSTRUCTIONS: Measure all content according to the chart in the test tubes. Mix well and incubate for 5 minutes at 37°C temperature in incubator. Read the optical density of the test and standard at 630 nm wavelength. Calculation: Serum Albumin (g/dL)= (Optical Density of Test × Concentration of Standard) / (Optical Density of Standard) Example Calculation: After testing:Optical Density of Test = 0.318Optical Density of Standard = 0.24 Therefore:= (0.318 × 4.0) / 0.24= 5.3 g/dL Normal Values: Parameter Normal Range Total Protein 6.0 – 8.0 g/dL Albumin 3.5 – 5.0 g/dL Globulin 2.5 – 3.5 g/dL A/G Ratio 1.0 – 2.0 Clinical Significance: Increased levels of albumin are present in cases of dehydration, especially noted for newborns.Decreased levels of albumin are present in conditions like malnutrition, nephrotic syndrome, hepatic
UREA
UREA (NED METHOD):- The reagent set is intended for in vitro Quantitative determination of Urea in Serum and plasma. CLINICAL SIGNIFICANCE:Urea is the end product of the protein metabolism. It is synthesized in the liver from ammonia produced by the deamination of amino acids. It is transported by blood to the kidneys where it is excreted. Increased values are found in renal failure, urinary tract obstruction, shock, congestive heart failure and burns. Decreased levels are found in liver failure and pregnancy. PRINCIPLE:Urea forms with ortho–phthalaldehyde and Naphthylethylenediamine in the acidic medium a coloured complex. The value of colour formed is directly proportional to the urea concentration in the test sample and is measured by a fixed time method at 550 nm. REACTION:Urea + ODA → NH₃ + H₂ONH₃ + NED → Orange Color Complex. CONTENTS:Reagent 1 : ODA ReagentReagent 2 : NED ReagentReagent 3 : Urea Standard, 50 mg/dl MATERIALS REQUIRED BUT NOT PROVIDED: Clean Dry Glassware Laboratory Glass Pipettes or Micropipettes & Tips Bio–Chemistry Analyse SAMPLES: Serum, Heparinized/EDTA Plasma. Urea is reported to be stable in the serum for 5 days when stored at 2–8°C. PREPARATION OF REAGENT & STABILITY:All the reagents are ready for use and stable till the expiry date mentioned on the label when stored at 2–8°C. GENERAL SYSTEM PARAMETERS:Reaction type: End pointWavelength: 550 nm (520–550 nm) (Increasing)Temperature: 37°CReagent Volume: 1.0 mlSample Volume: 10 µlZero setting: Against Reagent BlankLight path: 1 cm. PROCEDURE:Pipette into clean dry test tubes labeled as Standard (S) and Test (T) Addition sequence (S) (T) ODA Reagent 1.0 ml 1.0 ml Sample — 10 µl Standard 10 µl — Mix well and incubate at 37°C for 5 minutes NED Reagent 0.05 ml 0.05 ml Mix well and read the absorbance A₁ of the standard and test after exactly 5 minutes. Read A₂ after exactly 10 minutes. The absorbance reading to be recorded at 550 nm.Finally, take the difference A₂–A₁ for both the standard and test. For Standard: ΔA = A₂S – A₁SFor Test: ΔA = A₂T – A₁T CALCULATION:Urea Concentration (mg/dl) =(ΔAT / ΔAS) × 50 NORMAL VALUE:Serum/plasma: 15–40 mg/dlEach laboratory should establish its own normal range depending on the population. LINEARITY:The method is linear upto 200 mg/dl. The value exceeding 200 mg/dl should be diluted appropriately with distilled water and the values obtained multiplied by dilution factor. QUALITY CONTROL:For accuracy it is necessary to run known controls with every assay. LIMITATION & PRECAUTIONS: Storage condition of the reagent and kit should be strictly followed. Avoid contamination of reagents. All glassware must be dry and free from detergent or debris. BIBLIOGRAPHY: Goodwin, J., Hart, T., Am. J. Chem., 26 (1977) 707 CODE NO. PACK SIZE Reagent 1 Reagent 2 Reagent 3 Z18 100 ml 1 x 100 ml 1 x 50 ml 1 x 3.0 ml BEACON DIAGNOSTICS PVT. LTD.424, NEW GIDC, KABILPORE, NAVSARI – 396 424, INDIA